
Wilderness Survival Shelters
The most important survival skill once you have water is building survival shelters. When you were a kid, you probably built forts. Well, survival shelters are the grown-up version of forts. Although the shelters you see here are better than anything I ever built as a kid!
Making survival shelters is an especially important skill in cold and wet places. If you are stranded or out survival camping without any gear, then you need to know how to stay alive and comfortable. Some of the wilderness survival shelters I describe here are long-term more permanent dwellings. Some are short-term survival shelters.
If you plan on staying in the same area for weeks or months, you will probably build both a long and short-term shelter. You can use a short-term shelter like a debris hut for a week or two while you build a more permanent structure like a wigwam or wickiup.
Types of Survival Shelters
Natural Shelters
Debris Huts
Wigwams and Wickiups
Thatched Grass and Cattail Shelters
Desert Shelters
Snow Caves and Winter Shelters
Tarp Shelters
.
When I was younger, some of my primitive camping stays were completely miserable because I didn’t know how to build a shelter that kept me warm and dry. Learning to make decent shelters totally changed my experiences camping out with little gear.
The first really good shelter I made was a debris hut in Menomonie, Wisconsin. It was the dead of winter and I cross-country skied into a remote area. I spent the day making a shelter. That night it got down to 19 degrees BELOW ZERO. But, I was toasty warm in my shelter without a fire, blanket, or sleeping bag.
I experimented with different shelters until I could build a warm, dry survival shelter in any season in Wisconsin. Later I learned to make semi-permanent shelters in the deserts of the United States, and in more tropical areas like Thailand, Indonesia, and Myanmar.
The one certainty when learning to build your own survival shelters is that no two shelters will be the same. A lot will depend on the environment you’re in and what materials you have there.
So, in addition to giving you links to my favorite long and short-term shelters, I want to go over the four essentials every shelter must have. I got these elements years ago from my friend Tom Elpel. He goes over them in his book Participating in Nature.
The Four Shelter Essentials
Waterproofing
Fire
Insulation
Windproofing
.
Waterproofing
There are a lot of ways to make survival shelters waterproof. By far the easiest way is to carry a tarp, emergency blanket or a sheet of plastic. Those are all great if you have them with you, but there will be times when you go out without them to practice your survival skills. And there might be times when you are in an emergency situation and didn’t think to bring anything with you.
So, here are some principles for waterproofing your shelter when you don’t have a man-made cover with you. Simply piling up enough leaves, grasses and pine boughs over a frame like a lean-to or debris hut skeleton will create a waterproof roof over your head.
Another way to make your survival shelter waterproof is using bark slabs for the top and sides of your shelter. You can find bark slabs on dead trees. Poplars, and especially cottonwoods work really well. Traditionally live birch, elm and various poplar trees were used.
If you are in an area that has a lot of tall grass or cattails, you can build a thatched wigwam or wickiup. You’ll want to start tying on the thatching at the bottom and work your way up. Put the thatching on so it overlaps about one-third of the grass below it.
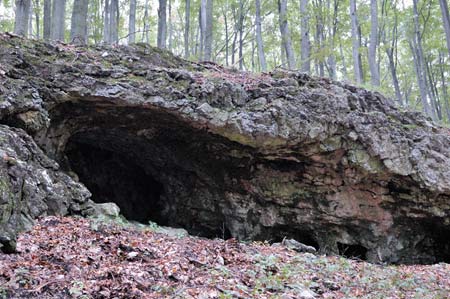
And by far the easiest survival shelter to stay in is a natural shelter. Caves and rock outcroppings are great. Sometimes you can build a quick survival shelter where a tree has been uprooted. The hole in the ground gives you more space. The roots and dirt stuck in them gives you a ready-made wall already done for you.
Top of wilderness survival shelters page
Fire
Having a fire INSIDE your shelter is often both overrated and dangerous. Your shelter is made of is highly flammable material so there is the possibility of you and the shelter going up in flames. And no matter how many TV shows you see where people have a fire going in their shelters, it’s often easier to build a fire outside the shelter.
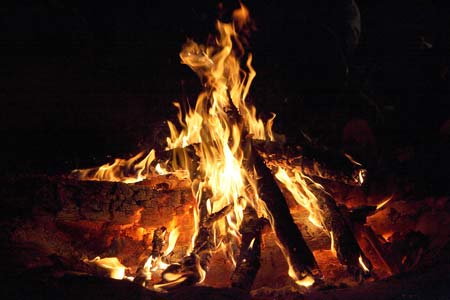
There are a couple of ways to get heat from a fire you have outside your shelter. The simplest is to build your fire a few feet from your shelter and make a fire reflector. The reflector is a simply a wall of rocks or branches that reflects the heat from your fire into the opening of your shelter. The fire will be sandwiched between the shelter and the reflector.
The second way to get heat in your shelter when your fire is outside is to heat rocks. You simply put medium-sized rocks in or around your fire and then drag them into your shelter at night. You can either bury the hot rocks or put them near your sleeping area.
If you bury the rocks inside your shelter, make sure you let all the moisture in the dirt evaporate before you go to bed. Otherwise, you will get soaking wet as the water in the soil condenses on you! Take it from me… that is not comfortable!
Top of wilderness survival shelters page
Insulation
Insulation traps the heat that is in your wilderness survival shelter and keeps it there. The colder it is, the more insulation you need. The debris hut I stayed in when it was 19 degrees F below zero with no fire was one huge ball of insulation. The outside was grass and leaves. The inside was cattail leaves, pine boughs and fine grass.
Cattail leaves and grass stems are great materials for insulating your survival shelter. They have air trapped between their cells making them great at holding the warm air inside your shelter. Tree leaves also work well because air gets trapped between the leaves.
If you need to get warm quickly, milkweed seeds and cattail down can be stuffed down your pants and in your shirt. When wet, milkweed seed down is a better insulator than goose down!
Top of wilderness survival shelters page
Windproofing
Often the materials that make your shelter waterproof will also windproof it. Thatching or a layer of leaves, grass or boughs will windproof your shelter if you put them on thick enough.
Dirt and soil are great for keeping wind from blowing through your shelter. The biggest problem with dirt is that you have to build a strong frame if you use it for the roof. The soil is heavy on its own, and it will get REALLY heavy in a rainstorm. If you make a shelter covered in soil, make sure the roof is well supported!
To make snow relatively windproof, you usually need to pile it up and compress it. This makes the snow denser and less likely to let wind through. If the outside melts a little in the daytime, it will make the shelter better able to keep the wind out the next night.
Top of wilderness survival shelters page
My Favorite Wilderness Survival Shelters
Natural Shelters
Finding a ready-made survival shelter saves a lot of time and energy in the wilderness. It also frees up your time. Instead of building a shelter, you can practice other survival skills.
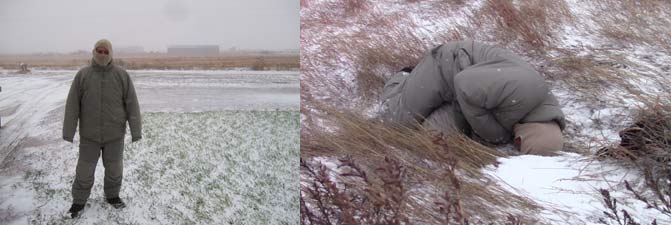
There is one shelter no one ever thinks of: the clothes you have on. There have been times when I have curled up in a tight ball and weathered out a storm. If you have the right clothes, you can be comfortable in rain and snow.
Natural shelters that people usually think of include caves and rock outcroppings. Those make great survival shelters. And don’t overlook something as simple as a conifer that you can crawl under in an emergency.
Pines, firs and spruce trees shed water and snow really well. Even in the worst thunderstorms you can stay dry at the base of these trees. This type of survival shelter has its limitations though, you can’t build a fire nearby and it’s hard to insulate them.
If you find a rock outcropping or cave DO NOT build a fire underneath either of them. The heat from the fire can make the rock above you break, fall and possibly kill you. It’s much better to build your fire outside the shelter and put a reflector behind the fire so the heat radiates into your living space.
Top of wilderness survival shelters page
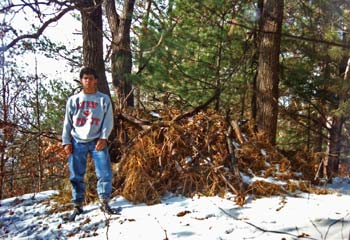
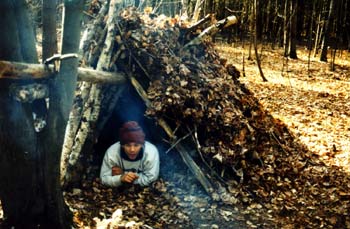
Debris Huts
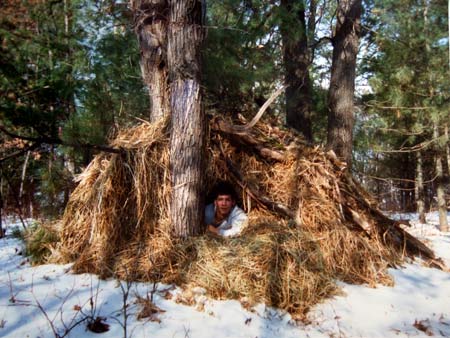
Debris huts are the first type of wilderness survival shelter many of us build. The debris hut is just a ton of whatever material is available piled on top of an A-frame. The huge pile of debris insulates, windproofs and waterproofs your shelter.
Something I don’t see people do that really helps to keep you warm is to pack the inside of your debris hut with pine boughs, grass and leaves. You want to stuff the inside of your hut full of these materials and then burrow into the insulation.
Something that makes building a debris hut a lot easier is to use a fallen tree, a big rock or and uprooted tree as a start to your shelter. You can use a fallen tree as the ridgepole of your shelter. And a big rock or uprooted tree gives you a complete, weatherproof wall to your debris hut.
Top of wilderness survival shelters page
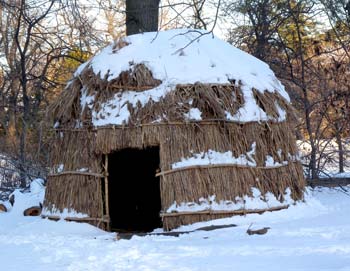
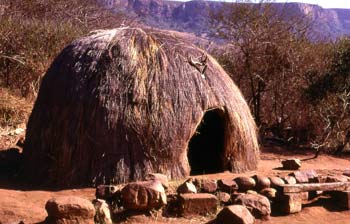
Wigwams and Wickiups
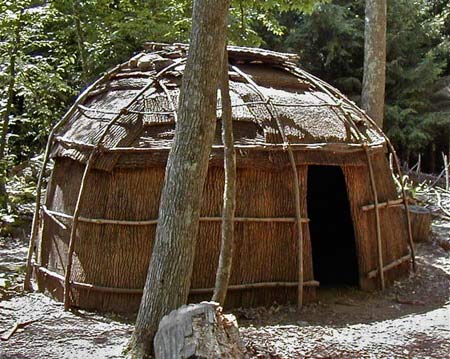
Wigwams and wickiups are basically the same thing. They are semi-permanent huts built on a framework of saplings. In the Western United States they are called “wickiups” and in the Eastern United States they are called “wigwams.”
Usually you sink poles made of saplings into the ground in a circle and tie the tops of the trees together to form a dome-shaped skeleton. Finally, the frame is finished by tying or weaving around the dome with saplings to complete the framework.
Then the frame is covered with something that provides the four essential parts to a shelter: waterproofing, fire, insulation and windproofing. The covering depends on what is available. Common materials include grass or cattail thatching. Rings of peeled bark and sometimes slabs of bark from dead trees are also great if you have them readily available.
One unique quality of a wigwam or wickiup is that you can safely build a fire inside the shelter. The fire pit is put in the center of the shelter. There is a removable cap on the outside of the shelter directly over the fire pit that is taken off when there’s a fire going. With this kind of system the smoke goes up through the hole and doesn’t fill the shelter with smoke.
Top of wilderness survival shelters page
Desert Shelters
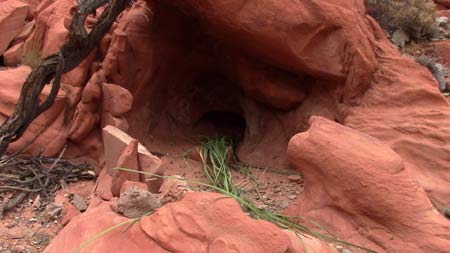
Building shelters in the desert presents a few unique considerations. First of all, there are usually limited resources. You might not have trees, branches or leaves to work with. Even rocks might be hard to find.
In the worst case all you’ll have is sand and more sand. The situation isn’t ideal, but you have to make due as best you can.
If you have a tarp, you can build a scout pit. A scout pit is simply a body-sized trench you dig out and cover with the tarp. You leave an opening at one end of the trench and crawl in the little survival shelter. It’s going to be really uncomfortable, you’re going to have sand in every single orifice of your body, bar none. But your little scout pit will keep you alive.
If you’re in open desert and you don’t have a tarp, you just have to bury yourself in the deepest trench you can build and still get out of. Again, not fun, but functional.
Another type of desert shelter is pictured above. In this case I had a good start from a natural rock outcropping. All I needed to do was put a few rocks around the perimeter of the shelter. The rocks reflected the heat from the fire into the cabin and protected the fire from the wind. Always look for a partial shelter to give you a head start.
Top of wilderness survival shelters page
Snow Shelters, Snow Caves and Quinzees
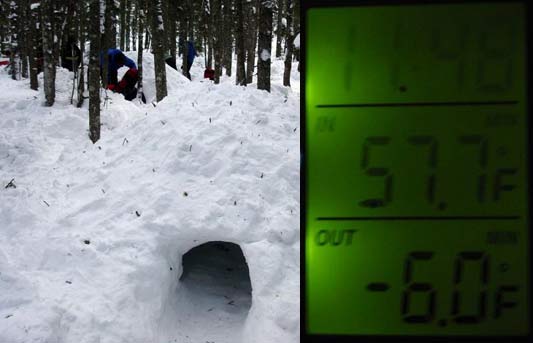
Snow caves make great survival shelters when they are done. But, you have to be really careful that you don’t soak your clothes while you’re building them. Wet clothing doesn’t insulate as well as dry clothing.
Moisture is a problem from both directions when building snow shelters, which makes building snow caves dangerous. First, your clothes can get wet on the inside from sweat from all the work you’re doing. Second, the snow can melt on you, soaking your clothes from the outside.
I have a solution that helps with both of these problems. If it’s warm enough while I’m building the shelter, I’ll take off as many clothes as I can and still be comfortable. I take the clothes I took off and put them somewhere where they’ll stay dry. Then when I’m done building the shelter, I’ll put my dry clothes on.
If I have to wear all my clothes when I’m building a snow shelter, I’ll work slowly so I don’t sweat very much.
The most practical snow shelter is a snow cave. The one I describe here is called a quinzee. To build one, you make a pile of snow. The top of the pile will be the top of you snow cave. You want the walls to be at least a foot thick, so make a BIG pile of snow.
Once your pile is built, you let the snow sit for an hour or two. You want the snow to gel into a solid mound of snow. Then when the snow has hardened, you hollow out the inside of the pile to make your quinzee.
For maximum comfort, the top of the shelter must be smooth. That way water runs down the walls and doesn’t drip on you. You also want to pack the bottom of the shelter with some kind of insulation: pine boughs, cattails, dry grass or dry leaves.
Top of wilderness survival shelters page
Tarp, Sheeting and Emergency Blanket Shelters
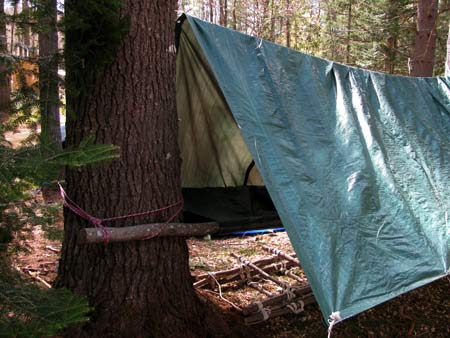
Sheeting type shelters are great short-term survival shelters. You take a sheet like a tarp and either wrap it around yourself or tie it down to make a survival shelter. All you need is something big enough so it reaches over your head and down the side that faces the wind.
These tarp shelters have a few advantages over primitive survival shelters. They’re incredibly fast to put up. You don’t need many extra materials to make them, usually just some cordage. They are waterproof. And the material to build them with is lightweight and can be easily carried in a survival kit.
Everyone has their favorite kind of sheeting that they rave about and swear is the best. I really like using rain flies from good quality tents. I had a North Face Rock 22 tent that got ripped in a wicked windstorm. The rain fly is now my favorite tarp shelter. It has built-in tie-down points, zippered openings, windows, and it’s rain proof. It is a bit heavier than a tarp or plastic sheet, but for a couple of extra ounces, it’s worth it to me.
Also, I see a lot of designs online for stand-alone tarp shelters. I like to use a tarp along with one of the survival shelters you see on this page. The man-made sheeting makes your shelter windproof and waterproof. I usually add leaves or grass on the outside for insulation and build a fire outside of the shelter. Mors Kochanski has a shelter using sheeting and a wood frame that looks good though I haven’t made one yet.
Top of wilderness survival shelters page