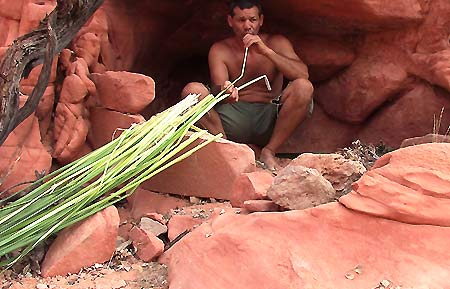
Wilderness Survival Skills
This is your place for expert wilderness survival skills training. When you master this section of the website, you can go anywhere in the world, with nothing but a knife, and live there as long as you want.
This is my favorite part of the website. You have all my articles on primitive survival skills. Everything from wilderness survival shelters to hunting and trapping to making baskets and containers. Everything you need to live in nature with nothing but a knife and your wits.
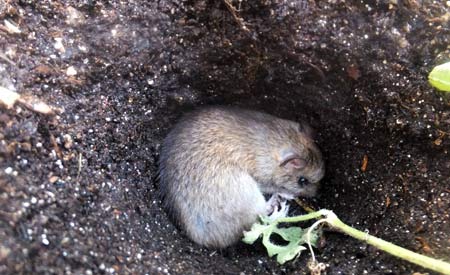
There’s a lot here. I’ve broken it down into categories to make it easier for you to find what you’re looking for.
The Essential Survival Skills: the 5 most important survival skills.
Wilderness Survival Shelters: Survival shelters for long or short term survival stays.
Water: All my articles on finding water and making it safe to drink.
Fire: Articles on modern and primitive fire starting methods.
Survival Food: Articles on harvesting animals plus gathering wild edible plants in a survival situation.
Hunting and Trapping: Getting meat as a survival skill.
Eating Insects: Gathering and cooking insects.
Navigation: Finding your way in the wilderness
Primitive Living Skills and Long-Term Wilderness Survival Skills
These are the topics listed on this page. Some of them have links to articles that give you even more detail.
Bow Making
Making Primitive Arrows
Cordage
Atlatls
Hide Tanning
Crafts When Hanging Out
Butchering Animals
Animal Tracking
Woven Baskets
Birch Bark Baskets
Coiled Baskets
Primitive Cooking
Bone Tools
Stone Tools
.
Making Primitive Bows
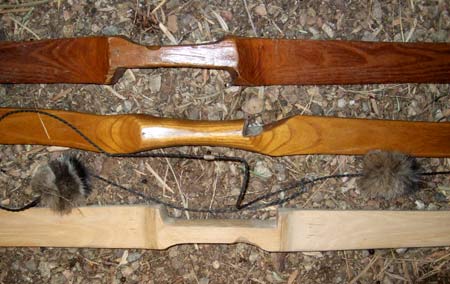
Making traditional bows is a great survival skill to have. It teaches you a lot about woodcraft and you’ll get a real appreciation for sticks. Think about it, you take a stick and make a tool you can use to harvest deer, elk and wild pigs. That is amazing!
Keys to making a traditional bow
- Make your survival bow wide and flat instead of narrow and round or oval. Wide bows with flat bellies last longer, have better shooting characteristics and don’t lose their shape over time when compared to bows of other shapes.
- The kind of wood you use isn’t as critical as you hear. Yes, some woods are better than others, but the reality is that you can make a bow with just about any tree or sapling.
- You want to find a section of wood that doesn’t have many knots in it. They weaken the bow, are hard to work around and make it easier to break the bow.
- The longer your primitive bow is, the more you can screw up building it and still have it work well. I usually make my bows my height or a few inches taller than me. I’m 5’10”, so my bows are between 68 and 72 inches.
- Your survival bow will be easier to shoot accurately if the limbs are about the same length.
- You want each limb of the bow to bend evenly.
Special tools like a drawknife are nice to have, but you can make a bow with just a knife. Don’t let a lack of tools stop you. Just make it!
Making a traditional bow takes a few days even when you have all the right tools. Its construction will wear you out and give you blisters. And when it’s all done, it could break the first time you pull it back! Plus, when the bow is done, you still have to make arrows and practice for days.
So, I would recommend that you have a good food source before you start to make a bow and arrow set. Set your traps and snares, have some nuts or fruit saved up and then start making a bow. Don’t rely on hunting with a bow and arrow to get food!
Bowstrings
You are going to need some kind of strong cordage for a bowstring. I have always made my bowstrings from 6 or 8 strands of commercial bowstring material. I also have two pre-made bowstrings in my survival kit.
There are two reasons I don’t make a bowstring from natural materials. One is because I haven’t found a natural material that’s strong enough and thin enough for my liking. And two, if the string breaks, my bow can break at the same time. I’m not willing to risk all the hard work of making a bow only to have it snap when a string breaks.
Top of wilderness survival skills page
Making Primitive Arrows
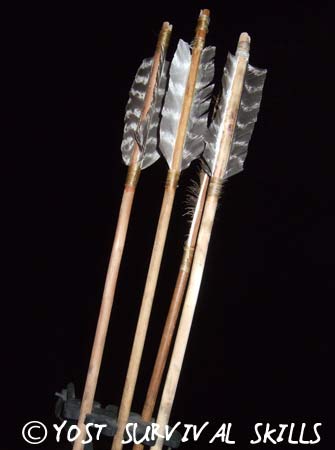
Making your own primitive arrows is actually fairly easy IF you have all the materials you need. That is a big “if” though. You’ll need a relatively straight stick for your shaft. Feathers are the best fletching material, but you can’t always find or kill a bird. You’ll need some kind of rock, metal or bone to make an arrowhead out of. And you need a way to attach the arrowhead and fletching to the shaft of your arrow.
Just to make an arrow you need quite a few things:
Materials for making primitive arrows
- A straight-ish stick
- Feathers for fletching
- Bone or stone you can shape into an arrowhead
- Strong cordage to attach the fletching and arrowhead
- And maybe some kind of glue to help with the fletching and arrowhead
Keys to making traditional arrows
Okay, now that you found all the stuff for the arrow, let’s get to some tips…
- Make as many arrows as you have materials for at one time.
- The straighter the piece of wood is when you gather it, the easier it will be to work with.
- The kind of wood isn’t as important as people will have you believe. Opt for straighter rather than a certain kind of wood.
- Heat the arrow shaft gently but completely where you need to bend it to make it straight.
- Start putting the feather fletching on nearest to the nock end of the arrow so you can line them up easier.
- Attach all 3 feathers at the nock end before lashing or gluing them at the other end.
- It’s easier to attach your arrowhead if you have an adhesive and sinew. But, you can do it with cordage if that’s all you’ve got.
Top of wilderness survival skills page
Making Primitive Cordage
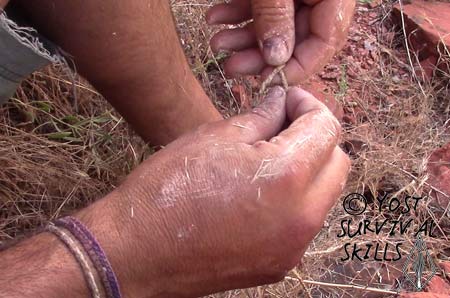
A Navy Seal friend of mine said that there are three essential wilderness survival skills: making cordage, making fire and finding water. A lot of people wouldn’t include cordage, but I agree. If you have cordage, you can make traps and snares, tie plants you’ve gathered together, make fishing nets and a million other things.
Materials for making primitive cordage
The best way to find good cordage material is to break a stick or plant and see if it has long fibers. It’s important that you experiment with different plants to find your favorites.
Here are some materials that I’ve made good cordage with: inner bark of basswood and willow, dogbane, velvetleaf, nettles, milkweed, yucca leaves, agave leaves, evening primrose and hemp.
How to make primitive cordage
Cordage is easy to make but it’s hard to explain the process. I’ll have a video here for you and show you how to do it, which will help you a lot. Until then, here is an explanation in words:
Hold a small bundle of fibers between your thumbs and pointer fingers. You want your fingers about 2 inches apart and you want one end of the fibers to be a few inches longer than the other end.
Twist the fibers in opposite directions until they kink and form a loop when you bring your hands together. Either the right or the left side will be over the top of the other side. Which side is on top depends on the direction you twisted the fibers, either way, it doesn’t matter.
Hold the loop between the thumb and pointer finger of your left hand.
You’re only concern from here on out is which bundle of fibers is on the bottom. Take the bundle on the bottom and twist it the way it is already twisting. Twist it until the fibers almost kink. Then take the twisted portion over the top of the other bundle of fibers.
When you take the newly twisted fibers over the top of the other bundle of fibers, that makes the other bundle the bottom set of fibers. You do the same thing with the new bottom set of fibers: Take the bundle on the bottom and twist it the way it is already twisting. Twist it until the fibers almost kink. Then take the twisted portion over the top of the other bundle of fibers.
As you take one set of fibers over the other set, you need to use your left hand to pinch the twist together. So, every time you take the bottom set over the top, you will move your pinch-point up a little bit. You just keep doing this over and over.
When your fibers start to thin out on one side, simply add in a few new fibers. To add in new fibers, lay them in so they extend an inch or two into the fibers of the other side of the string.
You just keep twisting the two bundles together, adding as you go, until the cordage is the length you want.
Top of wilderness survival skills page
Making an Atlatl
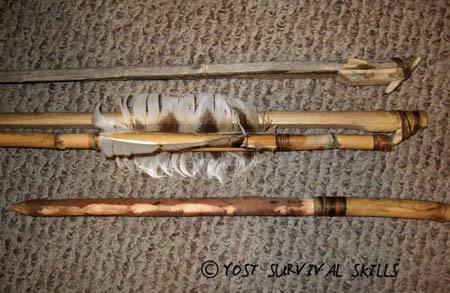
Atlatls are easy to make but hard to get good at.
None-the-less, they are becoming more and more popular. There are even a few states where you can legally hunt big game with them: Alabama, Alaska, Missouri, and two zones in South Carolina. Furthermore, Idaho, Illinois, Kansas, Kentucky, Massachusetts and Montana allow spearing rough fish with an atlatl. I’m not sure how practical it is to harvest carp with an atlatl, but at least you can make one and try it in some states!
*The laws might change, so don’t go by this. Check it out with the right agency in the state you want to hunt in before you go. This site has the most current information on hunting with atlatls I could find, but it isn’t all that current. So be sure to check on your own.
The device is pretty simple. There is a dart or spear that is propelled by a spear thrower (the atlatl). The dart is usually hollowed out at the end so a spur on the atlatl hooks into it. You balance the dart on top of the atlatl and swing it forward.
Some darts are two pieces. A dart and a foreshaft. The foreshaft slips into the end of the dart. When hunting, the dart and foreshaft both penetrate the animal but the dart works its way out. Then the dart can be picked up and reloaded with another foreshaft.
Using the spear thrower, you get a lot more power and range in your throw. It works on the same concept as those long-range ball throwers for dogs.
Atlatls are fairly easy to make. I have only made two and I am not an expert. I did learn from an expert though. Here’s what I can tell you…
Tips for making an atlatl
- Take a look at the tips for making arrows to see my suggestions for fletching.
- It helps if both the atlatl and dart are straight.
- Make the atlatl about the length from the middle of your bicep to your outstretched fingers.
- Make the spur on the atlatl fairly small. I had one go too far into the dart and it snapped off.
- River cane and bamboo make good darts but you’ll have to make foreshafts.
- The small diameter end of your dart should be the end that goes in the spur of the atlatl.
- The large diameter end of your dart will take the foreshaft or arrowhead.
- Make the dart (including foreshaft if you are using one) about 7 feet to start with and cut them down if you have to.
To fine tune your dart, throw it and watch how it flies. If it dives down, cut a little off the dart. If it comes off the atlatl with the tip pointed up, you’ll need to put a heavier foreshaft on it.
Practice (a lot) in a deserted open field.
Top of wilderness survival skills page
How to Tan an Animal Hide
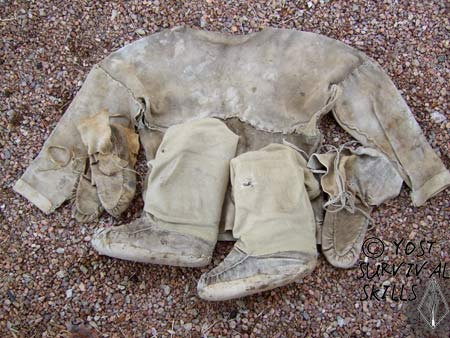
Tanning hides is one of the most rewarding primitive living skills. You can make clothes, moccasins and mukluks that will last for years. I have a buckskin shirt that is over 20 years old and it’s still in great shape.
There are two popular ways to tan hides, the wet scrape method and dry scrape method. I popped holes in the first two hides I started to tan using the dry scrape method. Ever since then, I’ve only used the wet scrape method.
Whichever method you use, you will probably be tanning with lecithin. That is the active ingredient in brain tanning. If you can’t get brains, and not everyone has them, 🙂 you can use lecithin granules from a health food store. I wrote a really good article on tanning with lecithin in Issue 19 of The Bulletin of Primitive Technology.
Here are my tips for tanning with the wet scrape method:
- Make a comfortable fleshing beam… you’re going to be using it a lot!
- Get as much meat and fat off the hide as you can before soaking it in ash.
- Make your potash solution so that potatoes float in it.
- Once it’s been de-haired, rinse the hide well to get as much as the ash out as you can.
- Soak the hide in lecithin or brains for a few days or until it starts to stink a tiny bit.
- When stretching and cabling your hide, don’t stop. The minute you take a break it seems like that’s the time you get a spot on the hide that dries too hard.
- Be careful when smoking your hide. You will be really pissed if you scorch or burn it after all that work.
When your hide is done, don’t be afraid to cut into it and make something out of it. It’s cool to look at, but wearing something you made from it is even cooler.
Top of wilderness survival skills page
Craft Projects for Around the Campfire
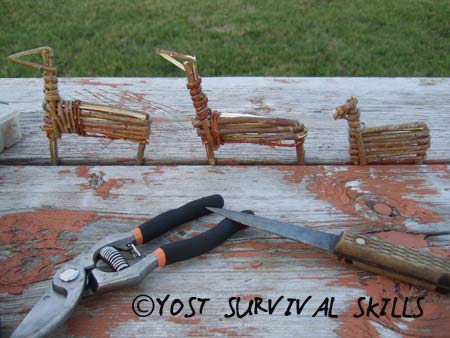
Making split willow deer figures is a great way to pass the time when you just want to relax.
Any sapling that tapers down quickly will work well. Dogwood, willow and alder are all great.
You can gather 5 or 10 saplings and make them all into deer ornaments in an hour or so. These make great gifts and I have a collection of them from different places around the United States. Here is a section of Tom Elpel’s book that shows how to make split willow deer figures. I make mine a little differently, but the idea is the same.
Another fun thing to do is to make containers out of pithy plants like elderberry, yucca and mullein. Basically all you do is take out all the pith and plug both ends. One end is left there permanently. The other end has a cap you can take on and off.
Traditionally these little vials were used to carry pigments, tobacco and crushed herbs. Here’s a video that shows you how to make a container.
Top of wilderness survival skills page
Butchering Animals
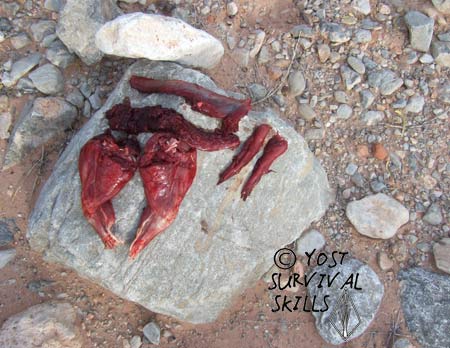
Butchering wild game is a lot easier than people think. I’ve seen people do an amazing job skinning and butchering deer with nothing but a stone blade. Most birds can be skinned with nothing but a knife or scissors.
Tips for butchering animals
- Fat, muscle and skin are easier to remove when the animal is freshly killed.
- When skinning birds and small game, remove the hide before you gut the animal.
- Hang the animal from a branch or stand it up on its butt when you gut it. Then gravity will pull the viscera down and away from the meat.
- Save all those guts! You can eat them or make really cool wilderness survival gear out of them!
- Tie the intestines off in two places right above the pelvic bone and cut between your tie off points. Save the intestines too!
- Use your hands more than your knife when butchering animals.
- Cut the meat and connective tissue around joints like knees and shoulders. Then twist the leg to separate the bones. You will probably have to cut tendons and cartilage as you twist.
- Deboning the meat is easier than messing with a bone saw. To debone the meat simply slide your knife along the bone. Save the bones.
People make a big fuss about meat spoiling, keeping the flies off of it and getting it cool as soon as possible. Those are probably good ideas.
But I have personally eaten all kinds of wild game that has been sitting out for days. Fly eggs and maggots are edible. Cooking kills most bacteria. And there are fewer pathogens in the wilderness to begin with.
Top of wilderness survival skills page
Animal Tracking
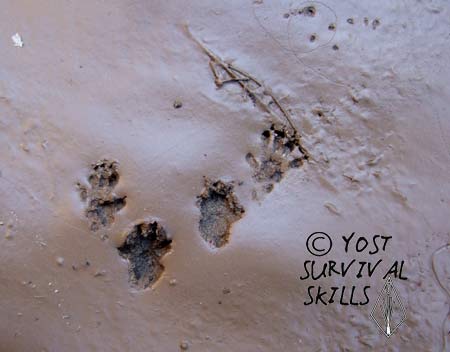
Tracking is a great wilderness survival skill to learn. It’s neat to be able to look at a track and know what made it, how long ago and what the animal might have been doing when it made the track. My friend Clay Hayes has a good video on tracking animals in snow.
Finding an individual print can be enough to identify what left a track. But, if you can see the animal’s gait pattern, you get a whole new set of clues. This is often the case when tracking animals in snow or mud. You can see a set of tracks.
Animals like woodchucks, badgers and raccoons that have wide bodies have a rolling diagonal gait. They walk by moving the front and back foot on the same side of their body at the same time.
Deer, moose, elk, canines and felines usually walk by moving the front leg on one side of their body and the hind leg on the other side of their body at the same time. (Human babies crawl the same way.)
Rabbits and hares gallop when moving at normal speed. Their hind legs shoot past where their front feet landed as they hop. The small prints of their front feet are diagonal across the track.
Squirrels also gallop when on the ground. Their tracks look the same as rabbit tracks except the front tracks are side-by-side.
Small mammals like gophers, mice and rats all gallop. The size of the tracks and the pattern left by the front feet will help identify the animal. Ground animals usually land with their front feet diagonally. Tree dwelling animals land with their front feet right next to each other.
Top of wilderness survival skills page
How to Make Primitive Baskets (Woven Baskets)
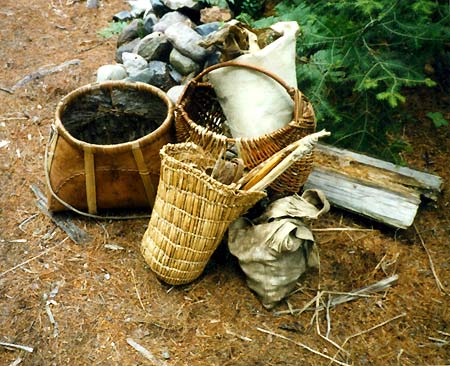
Making woven baskets for your survival needs is an important wilderness survival skill. You’ll be surprised how nice it is to have a few baskets for organizing your things. In a house you kind of take it for granted there is going to be a place to put your stuff. But, when you are standing in the woods looking for a place to put the tinder you just gathered, you’ll be glad you have a few baskets.
I love making woven baskets and have made hundreds. I only use three or four different weaves. They are all easy to learn and easy to use. The first is a figure 8 weave (see below). I use that at the beginning of all my woven baskets and usually for the whole bottom.
When I start the sides, I switch to a three-rod-wale (see below). It’s basically the same thing as a figure 8 except you use 3 weavers.
The only other weave I use consistently is a rim stitch to make the tops of my baskets look good and not come undone. I use an inside 2, outside one, and down the next weft.
Materials for making woven baskets
There are a lot of great materials for weaving primitive baskets. Some of my favorites are cattail, dogwood, willow, hazelnut and grapevine. The key isn’t to learn to identify all these plants though. What you want to do is look for material that is long and flexible.
Making a woven basket
There are a lot of ways to start your basket. After doing this for 30+ years, I found an easy start. Just place three sticks on top of three or four other sticks at a right angle. Then start weaving with a figure 8. On the first pass weave around all the sticks. On the second and third pass start to separate the sticks so they flare out in the shape you want your basket to be. Once you’ve gone around three or four times, you just weave in a figure 8 to make the bottom of the basket.
When you’re ready to start the sides of your basket, add a weaver so you have three instead of two. This is the three-rod-wale. Starting with the weaver farthest back, go behind two and out the next one. That will make a new weaver the farthest one back.
So, take that one and go inside two and out the next one. Keep doing that until the basket is the height you want. Then you are ready to make the rim.
To make a rim start with any warp stick you want. Grab it and go behind the next two warps, out the next one and down where the fourth one over comes out. This will make a really nice rim. Just a warning: the first few times you do this it’s going to be a puzzle working with the last few warps. This guy does a good job explaining the process.
Top of wilderness survival skills page
Making Birch Bark Baskets
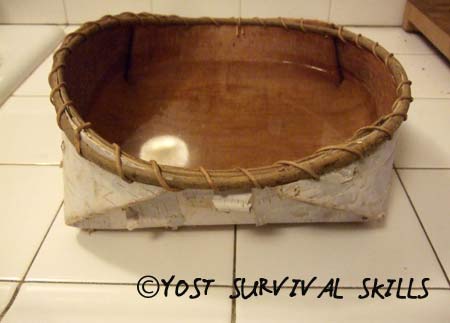
Making birch bark baskets is one of the most rewarding wilderness survival skills. You take the bark from a dead tree that would otherwise rot in the woods and create a basket that will last you forever. It is a transformation that will make you proud.
Tools for making birch bark baskets
All you really need to make a birch bark basket is a knife. It is nice to have an awl to poke holes for sewing. Clothespins for holding the basket together while you sew it are also handy.
Collecting birch bark
Use bark from dead trees. After a few years on the ground (or even standing), the wood rots away leaving behind just the bark. In some cases you can hold the bark and shake it and the rotted wood will slide right off the bark! Usually you will have to make a SINGLE cut to get the bark off though. Make this cut up-and-down the tree and peel it around until it comes off the wood. This works really well on dead trees, the key is to PEEL the bark around the tree and NOT cut it.
I make 99% of my birch bark baskets from fallen or dead standing trees. This bark is easy to work with and has stories written on it. Holes from woodpeckers, sapsucker taps and claw marks from climbing animals.
Sewing material
Traditionally birch bark baskets were sewn with spruce boots. Although any conifer (pine, spruce or fir) works well. You can also use regular cordage but I don’t think it looks as good on the finished basket.
You will also need a rim. The rim can be any flexible sapling or split piece of wood. I really like red osier dogwood and raspberry because the red rim contrasts beautifully with the bark. If you use a sapling, you want to split it so the rim lays flat against the top of the basket.
My favorite baskets to make from birch bark are an adaptation of traditional maple sugar baskets. They fold up beautifully and you can make them in any shape you want. I wrote an article on making these in Issue 16 of the Bulletin of Primitive Technology. You can get a copy of that issue by clicking the link above.
I also wrote a detailed post on how to make a birch bark basket on this website.
Top of wilderness survival skills page
How to Make Coiled Baskets
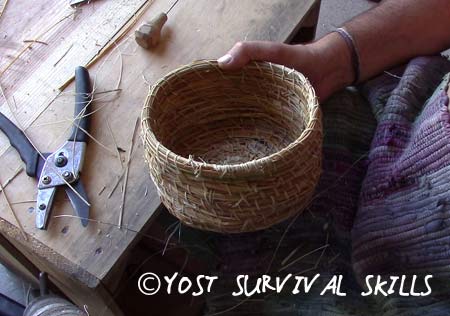
Making coil baskets is a great way to spend time around the fire talking at the end of the day. You can work on your basket and have enough brainpower leftover to concentrate on the conversation. These baskets last a long time. I have a coiled basket I made from grass the county cut along our road over 30 years ago. It’s still my favorite coil basket.
Materials for coiled baskets
Any flexible material you can gather together into a pencil-sized bundle will work for the bottom and sides of the basket. I have many coil baskets made of grass. Here in the Southwest, yucca is great to work with. Pine needles, thinly split willow, tule, bulrush and cattail are also good materials to make your basket with.
You’ll need something to sew the basket together with. Often you can use the material your warp is made out of to sew with as well. Grass or yucca work well for sewing. You can also make thin cordage or strips of palm leaves to sew the basket together.
Tools for making coiled baskets
The only thing you really need to make a coiled basket is a needle. Bone needles work great for making baskets because you don’t need a strong needle. Plus if you use a bone needle, you can make the working end of the needle sharp to pierce the warp but leave the back end flat so you can push it through with your thumb. A knife is nice to have as well.
How to make a coil basket
Coiled baskets are really simple to make. You just keep doing the same thing over and over. This is nice because it frees your mind up to think about other things. Making your basket will be meditative at some point.
The hardest part about making a coiled basket is starting the basket. To make it easier, bundle up a pencil-sized bundle of warp material. Starting about 3 inches from the end, wind around it toward the short end. Stop winding about 1/2 inch from the end. Then double the wound part over and wind around the unwound 1/2 inch AND the long end of the warp. After the extra 1/2 inch is wound, you will only have one piece of warp. At that point you simply sew the loose warp to the material that is already part of the basket.
As you go along, you’ll need to add extra material into the warp. There is nothing fancy about doing this, just stick it in. The only thing to pay attention to is that you keep the bundle about the same thickness.
Think of making your basket by sewing a rope together. The rope is the pencil-sized warp material. You simply sew the rope together to make the bottom and sides. When the bottom is the size you want it, simply stack the coils on top of each other instead of laying them side-by-side.
When the basket is the height you want, just stop adding warp material and let the basket taper to the end. That taper is important, you don’t want an abrupt stopping point.
Figure spending about 8-10 hours on your first basket.
Top of wilderness survival skills page
Primitive Cooking Methods
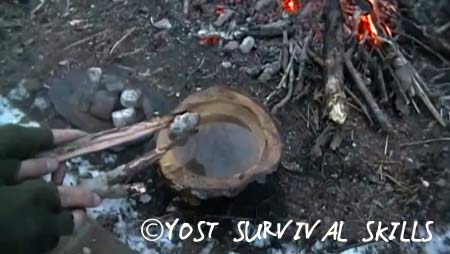
Cooking primitive is one of the most overlooked wilderness survival skills. The most difficult thing about primitive survival cook is doing it so you get the most nutrients as possible from your food. Steaming and boiling both meat and plants is the best way to get a lot of nutrients. Both of those cooking methods require a waterproof container though.
The only containers I’ve ever made that were completely waterproof were birch bark containers. Coal burned bowls let liquid through the pores, but they will work. Clay pots are your best bet, but I can’t teach you that yet because I’m just learning how to do it myself. So, what I do is carry a small, 775ml folding pot made by MSR. It’s a great little pot and my Wild Wood gas stove inside the pot!
The next best way to get as much out of your food as possible is to wrap your food in clay or leaves and put it in the coals of a fire. Fish is great cooked this way. I don’t bother cleaning the fish until after it’s cooked. I eat all the meat and skin from the fish. I will also open up the stomach to see if there is anything in there I want. When cooking meat this way, you have to guess how long to leave the food in the coals. After a few times, you’ll know when to take the food out.
When cooking small animals like mice, gophers and rats, you just throw them in the coals whole. Turn them when the hair has burned up and around the animal. Then let it cook on the second side. You will probably hear a hissing sound when the stomach of the animal pops. Let it cook another 30-60 seconds after that, and it should be done.
I eat these whole: head, stomach and intestines and all. Some people get squeamish about eating the guts, and if that bothers you, don’t do it, but those nutrients might save your life. The only thing to be careful of is getting cut by the animal’s teeth, so be careful when eating the head. Brains are delicious by the way.
You can also put a stick through the meat of an animal after you’ve butchered it and cook the meat over a fire or coals. If you do that, make sure you don’t waste the edible organs. For sure eat the heart, liver, kidneys, brains and tongue. People have starved to death eating only the meat of animals. You need to eat as much of it as you can stomach.
**The only thing I don’t eat, and would suggest you don’t either, is the stomach and intestines of large game like deer and elk. They can be cleaned out and used for other things though. The stomach makes a fairly waterproof container. The intestines can be packed full of dried fruit or meat to help keep the food inside clean.
Top of wilderness survival skills page
Bone Tools
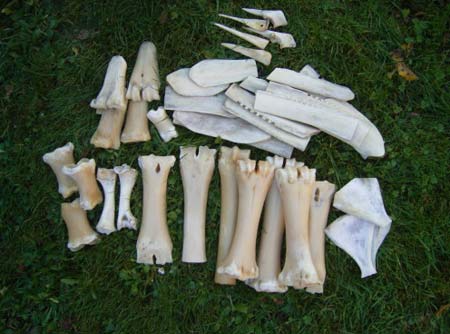
Bone makes great raw material for making tools. Scrapers and fleshing tools for tanning animal hides can be made from scapulars and long bones. Small rock cutting tools can be made by simply inserting the rock into the hollow part of the bone. Fish hooks can made from scapulars or toe bones.
Awls and needles can be made from a variety of different bones. I personally like making awls from deer cannon bones. These awls are strong enough to use for making holes in buckskin or birch bark and they double as bodkins for making woven baskets.
Scapulars make good cutting tools for harvesting grass when making a thatched shelter. The lower jaw bones of deer work well for this too. I see people make other cutting tools like knives from bones, but I don’t see the point. Bone knives chip and lose their edge quickly.
Bone is fairly easy to work with and shape. The biggest challenge is to get the bone to break where you want it to. You have to make a deep groove where you want the bone to break. You can tap the bone with a rock until it breaks, sometimes along the groove, sometimes not. A better way is to insert the edge of a knife or stone along the groove and hit it with another rock until the bone splits.
Once you have your tool roughed out, you can sand or grind it down to the exact shape you want. It helps to have a variety of different grades of sandstone. Regardless, you want to use a rough rock to sand and grind with.
I have heard of people who just smash a long bone and see what usable pieces they get. I wouldn’t recommend this unless you just want something small like a needle. You’ll end up wasting a lot of bone you could make stuff from. It’s better to make grooves so you have an idea where the bone is going to break.
Top of wilderness survival skills page
Stone Tools
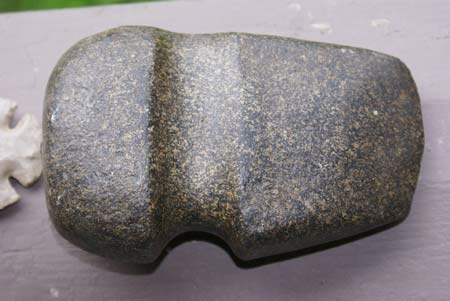
Paul Campbell wrote a book called The Universal Tool Kit. The book is about using simple stone tools to make everything you need. It’s an amazing book. It inspired me to learn even more about wilderness survival skills. Campbell shows how our ancestors have used fractured rocks as knives, scrapers, adzes, and other cutting tools.
More modern stove tools were shaped by slowly chipping away at rocks. This technique is called “pecking” because you peck away at the rock. When the rock is close to the shape you want it, you grind it against another rock. It’s best if the grinding rock is harder than the stone implement you’re making.
We usually think of tools like hammers, adzes and axes made by pecking. But, there are amazing ornamental artifacts from all over the world made from stone.
A few tips on making stone tools
Note that I have never pecked an entire stone tool. I started pecking an axe years ago, but it took longer than I was willing to spend making it. The best advice I can give you is to…
- Start with a rock that is close to the shape you want your finished tool.
- Peck away at your tool with a rock that is harder than the tool you’re making.
- Make your tool in stages, your hands will get sore from the constant vibrations of one rock hitting the other.

Hi Ken,
Great that you messaged me through the contact information here and it was wonderful spending the weekend with you and your girlfriend! I’m looking forward to getting together again and doing some more outdoor wilderness skills!
To answer your question in case others have the same question…
I started building forts and starting fires with bowdrill when I was just a kid. I’d go around shooting stumps and trees with simple bows made from maple saplings and arrows from cattails. Then in high school I started exploring more and refining my skills. I taught outdoor skills while going to college. Then I got a “real” job teaching Science in high school. Now I’m back to teaching survival skills in the Madison area.
Just wondering how and where you got started with all this?
I am very driven to learn and eventually teach these skills.
I have been in the Army Reserve for 17 yrs and found some knowledge through books and internet and have been wanting to do a class in person and now is my time to do it.
Please let me know when you are able to do a certified instructor type class incorporating all that you teach and know.
As soon as possible
Thank you for being here.
Hi Tim! I sure do. Just email me from my contact page http://www.yostsurvivalskills.com/contact
Looking forward to hearing from you!
John
Hello, I am looking for courses over a weekend. Sat and Sunday. Survival, shelters, fire, food, water, hunting etc.
Do you offer a combined weekend course?
Thanks, Tim