
So this is how my world works… and how I end up in places I never could have imagined.
Last spring, April 17th to be exact, it snowed about 6 inches in Wisconsin. I hate snow. In fact I hate winter period.
I was spending my first winter back home in Wisconsin after 12 years of being gone. And, I wasn’t terribly pleased to be getting snowed on in April!
We have a saying there, you might have the same saying in your home state. It goes, “April Showers bring May flowers.”
So, it’s not supposed to bloody snow in April!!! If anything, it’s supposed to rain.
That afternoon I called around and found out there was a paragliding competition in Florida. Warm, sunny Florida!
The very next morning, I packed up my CRV and drove to Florida to fly my glider for a couple of weeks!
Well, Mother Nature was messing with me no matter where I was. And it turned out that we had crappy weather all week. Which meant we only got to fly 2 of the 6 days.
The other 4 days everyone just kind of hung around at camp and talked. Well, I’m not very good at being idle and sitting around. So I started on some crafts from plants I found around camp… baskets, brooms, cattail dolls, and other little crafty things.
I ended up teaching a handful of people how to make cattail dolls and baskets. The week turned out to be very flattering impromptu classes on crafts and making bow drill fires. I say flattering because people were really interested in these skills and appreciated making their own things.
The brooms were a big hit, and I made a handful of them for other paraglider pilots. They loved them. So, I thought I’d write something up for you here, along with pictures, to show you how I made them.
And while I use fan palm fronds for the brush here, you can make your broom with tons of different materials. The process is pretty much the same.
I’ve used the lots of plants for the brush part of my brooms…. the ends of willow shoots leftover from making baskets, mustard plants, yucca, grass flower stalks, and cedar leaves.
All that’s required from the material you make the brush part of your broom out of is that it’s fairly resilient to bending and you have to be able to line it all up even at the bottom. Or be able to cut the material off evenly.
So get a few handfuls of the seedhead stalks from grass, willow, or if you want to cheat, use broom corn. These are what you’ll use to make the brush.
You’ll also need some cordage. In these pictures I just use some hemp string in had in the car.
The only other thing you need is a stout branch or something similar to make into a handle.
The only tool you need is a knife. And a scissors is nice if you have to cut the ends off evenly on the finished broom.
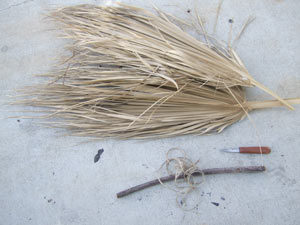
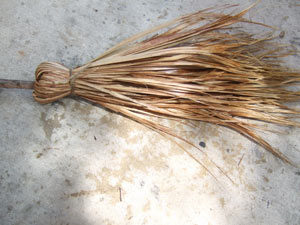
Once you have everything you need, line up the material you’re going to use for the brush so it’s as even as you can get it.
Don’t cut anything yet, you will do that last.
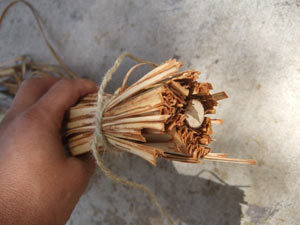
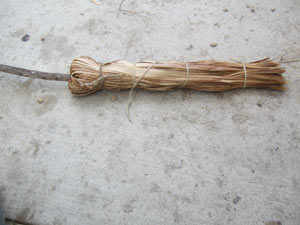
Now, position your brush material evenly around the handle so that the brush material covers the end of the handle.
At about 6 inches up from the bottom of the handle, tie the brush material as tightly as you can to the handle. The brush stuff is going to want to spin and become uneven as you tie it on. Just do your best to keep it even.
Tie the brush material to the handle in a second spot close to the end of the handle.
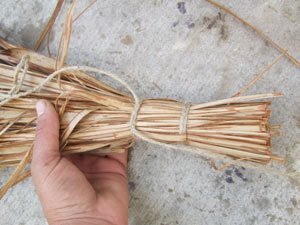
So now the bottom of the handle should be buried in the bush material. Take the brush material and double it back over itself so it sticks out opposite the handle.
Hold it there and tie the brush part down tightly. Make it so you catch the bottom of the handle with this knot.
Next, go down a few inches and tie around the broom a second time with another really tight knot. If you have a lot of brush material sticking out beyond the handle, go down a few more inches and tie it again.
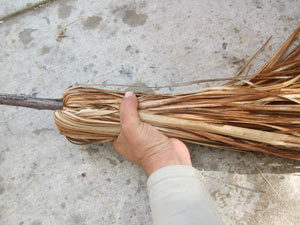
You’re going to lash the brush material together temporarily so you can cut it all off even. So go a few inches up from where you want the bottom of your brush to be and tie it all together. All this does in hold things together while you cut the ends off.
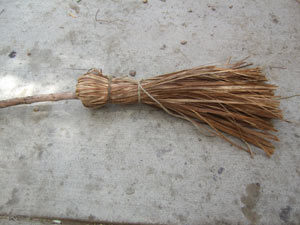
Cut off the ends, untie the last lashing, and your broom is done!

These are great brooms to make and use. A lot of times, as the broom wears away, I’ll just cut the ends off until it’s just a stubby little broom.
They are great for sweeping out your tent or tarp, brushing the crap off your sleeping pad and bag, and cleaning under your sleeping pad before you lay it down. I also use mine to brush the snow off my boots before going in the cabin.